Advanced Techniques for Photographing Nature
Introduction
Nature photography with film requires specialized techniques to capture the beauty, scale, and detail of natural environments. Film's unique rendering of light, color, and texture can create compelling nature images with a distinctive aesthetic that differs from digital capture. Advanced techniques help photographers overcome the limitations of film while leveraging its strengths.
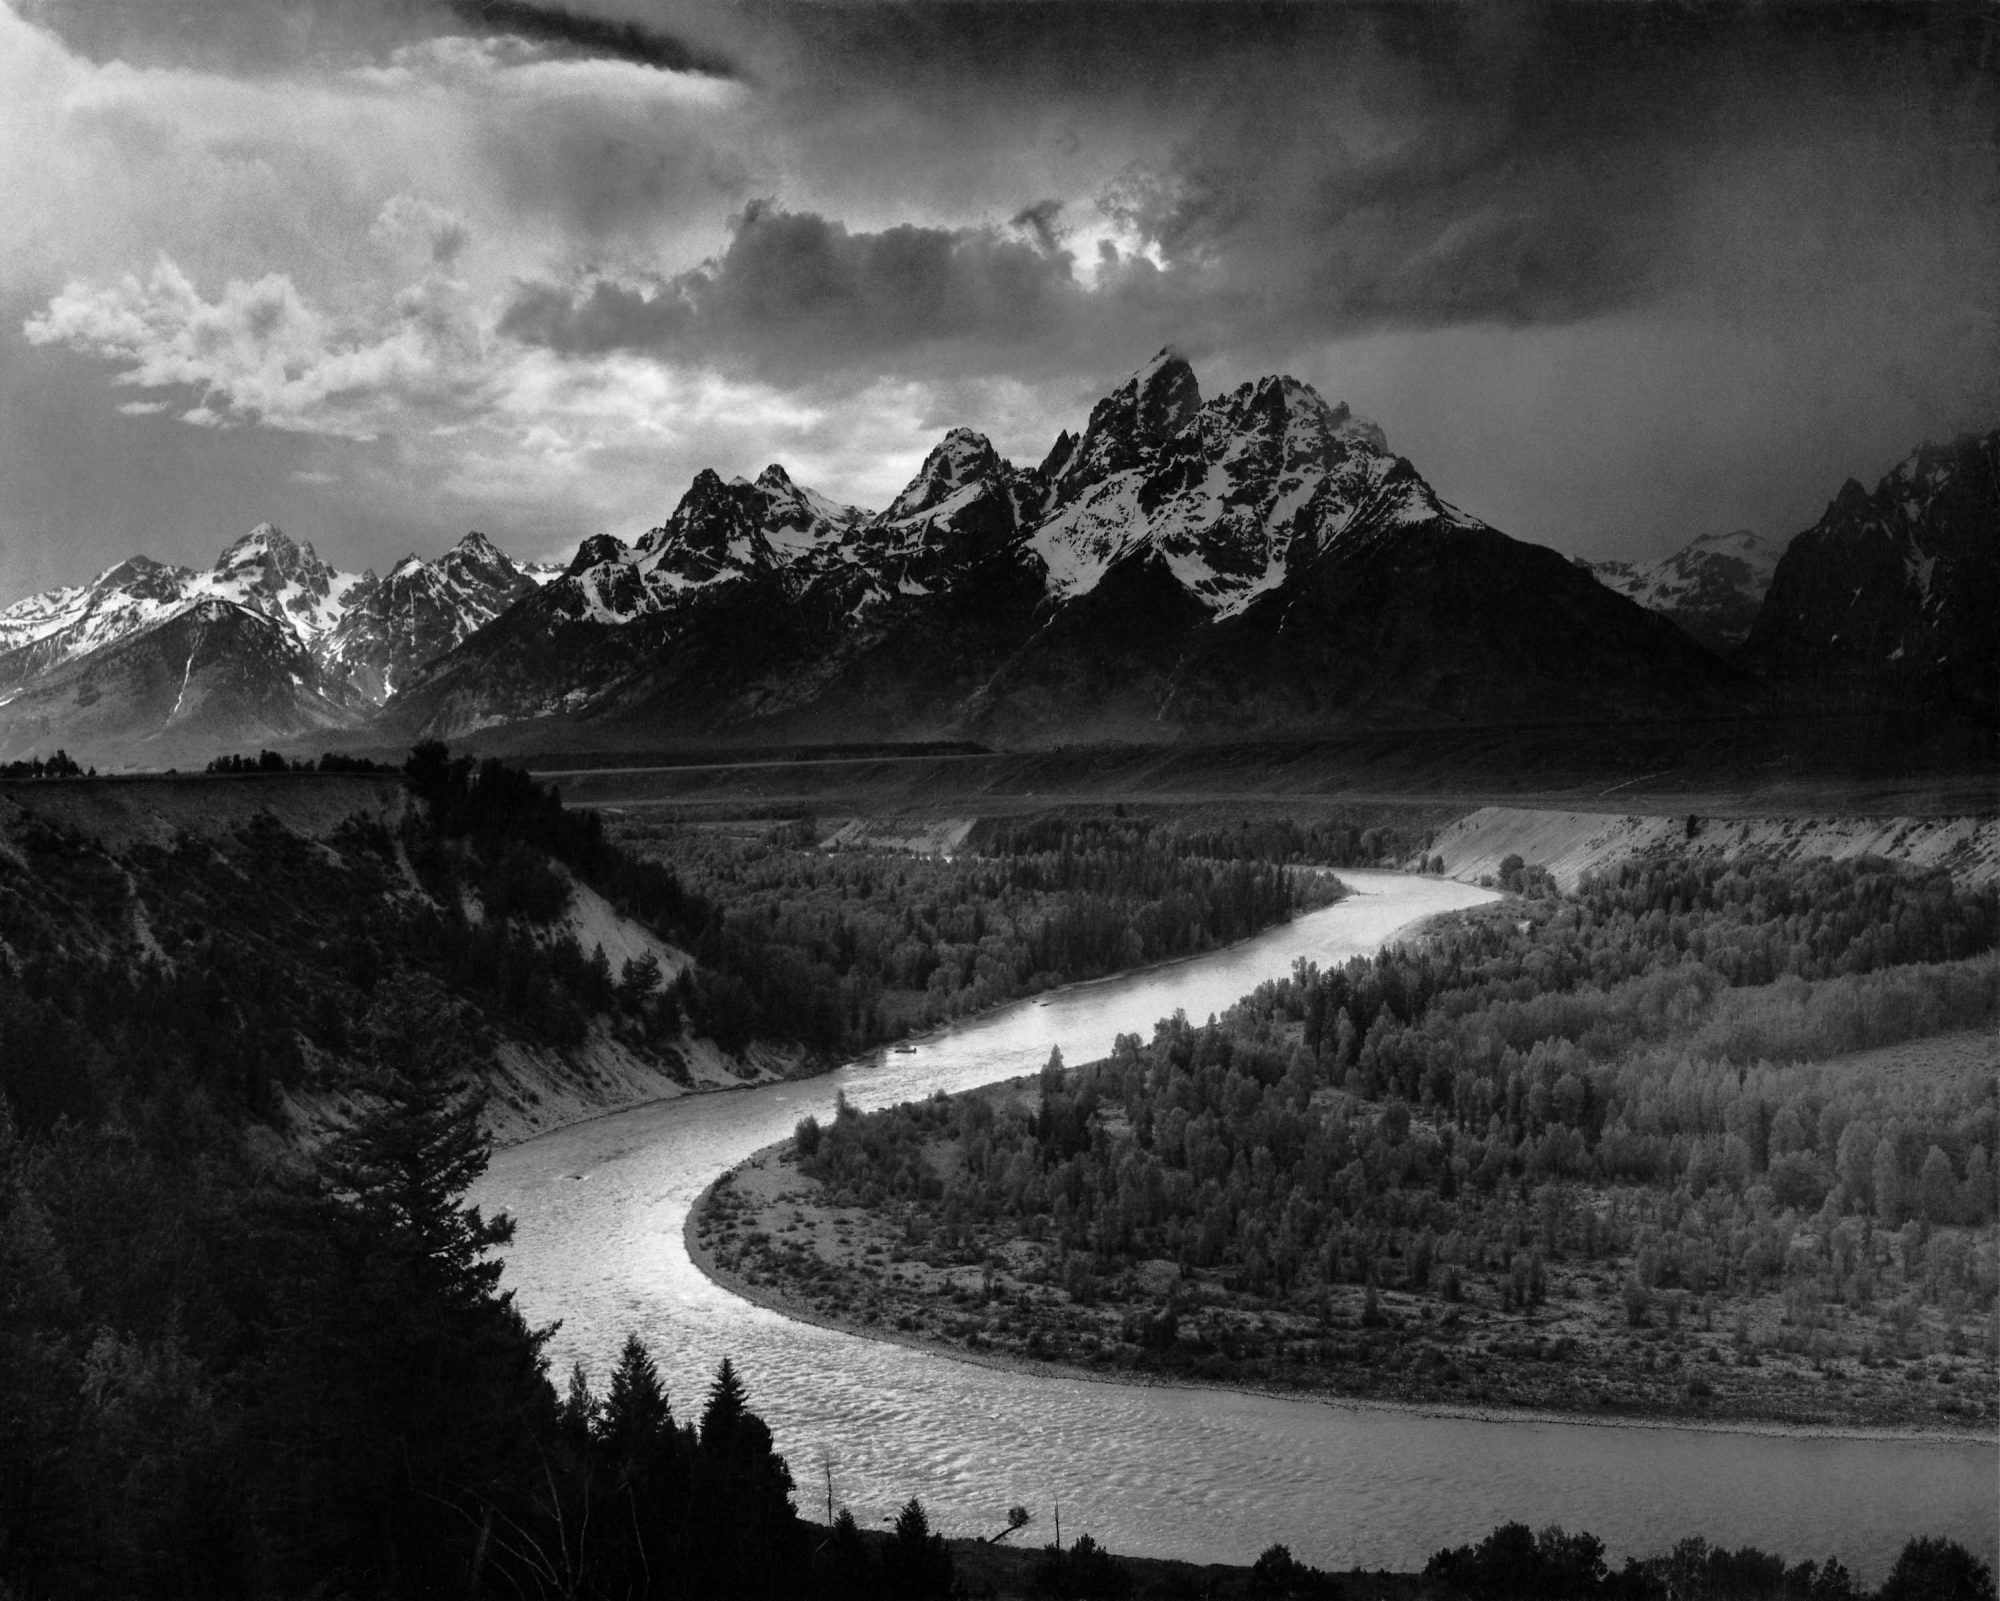
Ansel Adams' iconic landscape photograph 'The Tetons and the Snake River'. Image: ERIC KIM
Key Principles and Terminology
- Zone System: Ansel Adams' method for precise exposure and development control
- Visualization: Pre-imagining the final print before making the exposure
- Filtration: Using colored filters to control contrast and tonal relationships
- Reciprocity Failure: Film's decreased sensitivity during very long exposures
- Bracketing: Taking multiple exposures at different settings to ensure optimal results
- Hyperfocal Distance: Focus point that maximizes depth of field from foreground to infinity

Ansel Adams' photography techniques for landscape photography. Image: Urth Magazine
The Zone System for Nature Photography
Understanding the Zone System
Developed by Ansel Adams and Fred Archer, the Zone System is a systematic approach to determining optimal exposure and development. It divides the tonal range from pure black to pure white into 11 zones (0-X):
- Zone 0: Pure black, no detail
- Zone I: Near black, slight tonality but no texture
- Zone II: Textured blacks, deepest shadows with detail
- Zone III: Dark shadows with clear texture (important shadow details)
- Zone IV: Average dark foliage, dark stone, landscape shadows
- Zone V: Middle gray, 18% reflectance, clear north sky
- Zone VI: Average Caucasian skin, light stone, shadows in snow
- Zone VII: Very light skin, light gray objects (important highlight details)
- Zone VIII: Whites with texture and delicate values
- Zone IX: White with slight detail
- Zone X: Pure white, no detail
Applying the Zone System in the Field
- Evaluate the Scene: Identify the most important shadow and highlight areas
- Meter Key Areas: Use a spot meter to measure specific areas of the scene
- Place Values: Decide where to place important shadow details (typically Zone III) and check where highlights fall
- Adjust Development: Plan for normal, expanded, or contracted development based on scene contrast
- Expose: Set exposure based on your placement decisions
For nature photography, the Zone System helps manage challenging lighting conditions like bright skies against dark foregrounds or the deep shadows and bright highlights in forest scenes.
Filtration Techniques
Black and White Filters
Colored filters alter how different colors are rendered in black and white photography:
- Yellow Filter (#8): Slightly darkens blue skies, improves cloud definition, lightens foliage slightly
- Orange Filter (#21): Significantly darkens skies, increases contrast between clouds and sky, lightens warm tones
- Red Filter (#25): Dramatic sky darkening, makes foliage appear darker, creates striking contrast
- Green Filter (#11): Lightens foliage, useful for separating different green tones in landscapes
- Blue Filter (#47): Lightens skies, darkens warm tones (less commonly used for landscapes)
Neutral Density (ND) Filters
Reduce light entering the lens without affecting colors:
- Standard ND: Uniform darkening across the frame, allows longer exposures or wider apertures
- Graduated ND: Darkens only part of the frame, useful for balancing bright skies with darker foregrounds
- Variable ND: Adjustable density, convenient but can cause uneven effects
Polarizing Filters
Reduce reflections and increase color saturation:
- Darkens blue skies without affecting other colors
- Reduces glare from water, leaves, and other non-metallic surfaces
- Increases color saturation, especially useful for foliage and water
- Most effective when used at 90° to the sun
Focus and Depth of Field Techniques
Hyperfocal Distance
The hyperfocal distance is the closest focus distance that allows objects from half that distance to infinity to appear acceptably sharp. Using hyperfocal focusing:
- Determine the hyperfocal distance for your lens and aperture (using charts, apps, or calculations)
- Focus precisely at that distance
- Everything from half the hyperfocal distance to infinity will appear sharp
This technique is particularly valuable for landscape photography where both foreground and distant elements need to be sharp.
Selective Focus
Using shallow depth of field to isolate subjects in nature:
- Use longer focal lengths and wider apertures
- Focus precisely on the most important element
- Consider the background and how it will render when blurred
- Particularly effective for isolating flowers, wildlife details, or abstract natural patterns
Focus Stacking (with Multiple Exposures)
For scenes that exceed the depth of field capabilities of a single exposure:
- Make multiple exposures with different focus points
- Keep camera position absolutely consistent between shots
- Process and combine in the darkroom using masking techniques (advanced)
Long Exposure Nature Photography
Reciprocity Failure Compensation
When exposures extend beyond about 1 second, film becomes progressively less sensitive to light than expected. This requires additional exposure compensation:
- Consult film data sheets for specific reciprocity characteristics
- General guideline: For exposures of 1-10 seconds, add 50-100% more time
- For exposures over 10 seconds, you may need to add 200-400% more time
- Color films may require filtration adjustments for long exposures due to uneven color sensitivity
Creative Applications
- Moving Water: Exposures of 1/2 to 4 seconds create silky water effects
- Cloud Movement: Exposures of 30 seconds to several minutes show cloud motion
- Star Trails: Exposures of 15 minutes to hours capture the rotation of stars
- Light Painting: Using artificial light sources to illuminate elements during long exposures
Essential Equipment
- Sturdy tripod
- Cable release or locking remote
- ND filters for daytime long exposures
- Watch or timer
- Flashlight for focusing and navigation
Large Format Nature Photography
Large format photography (4×5", 5×7", 8×10") offers unparalleled image quality and control for nature photography. Ansel Adams primarily worked with large format cameras for his iconic landscapes.
Advantages of Large Format for Nature
- Exceptional detail and resolution
- Camera movements for perspective and focus control
- Individual sheet film processing for custom development
- Forces deliberate, thoughtful approach
Camera Movements
- Tilt: Adjusts the plane of focus to follow non-parallel subjects (e.g., receding landscapes)
- Shift: Corrects perspective distortion (e.g., keeping trees vertical)
- Swing: Similar to tilt but on the horizontal axis
- Rise/Fall: Adjusts framing without tilting the camera (useful for including more sky or foreground)
Workflow Considerations
- More equipment to carry (camera, lenses, film holders, dark cloth, tripod)
- Slower, more methodical process
- Limited number of exposures (typically carrying 10-20 sheets)
- Higher cost per exposure
Practical Tips for Beginners
- Scout locations in advance and return when light is optimal
- Use a sturdy tripod for maximum sharpness
- Carry multiple film types for different lighting conditions
- Learn to read natural light and anticipate changes
- Consider graduated neutral density filters for high-contrast scenes
- Use a spot meter for precise exposure in challenging lighting
- Keep detailed notes about exposure settings and conditions
Common Mistakes to Avoid
- Underestimating the contrast range in natural scenes
- Failing to account for reciprocity failure in low light
- Not using a tripod for critical sharpness
- Overlooking subtle compositional elements
- Using inappropriate filters that detract from the scene
- Neglecting foreground elements in landscape compositions
- Expecting film to capture the full dynamic range of high-contrast scenes
Examples and Case Studies
- Ansel Adams' Approach: Application of the Zone System in "Moonrise, Hernandez, New Mexico"
- Large Format Landscape: Using camera movements for optimal focus and perspective
- Intimate Nature Details: Close-up techniques for capturing patterns and textures
- Moving Water Studies: Long exposure techniques for creating ethereal water effects
- Seasonal Considerations: Adapting techniques for different lighting and weather conditions
Ansel Adams' Legacy in Nature Photography
Ansel Adams revolutionized landscape photography through his technical mastery and artistic vision. His approach to nature photography included:
- Visualization: Adams emphasized "seeing" the final print before making the exposure, considering how the scene would translate to black and white
- Technical Precision: Meticulous attention to exposure, development, and printing to achieve his pre-visualized results
- Environmental Advocacy: Using photography to promote conservation and appreciation of wilderness
- Patience and Persistence: Waiting for perfect light and returning to locations repeatedly
- Emotional Connection: Capturing not just the literal scene but its emotional impact
Adams' techniques remain relevant for film photographers today, particularly his emphasis on understanding the relationship between exposure, development, and the final print. His systematic approach provides a framework for managing the technical challenges of film while pursuing creative expression.
Continue Learning
Now that you understand advanced techniques for nature photography on film, you might want to explore:
- Lenses for Film Cameras - Learn which lenses are best suited for nature photography
- Developing Film Process - Discover how development affects your nature images
- Test Your Knowledge - Take a quiz on nature photography techniques
- Practice with Flashcards - Reinforce your learning with flashcards